

Photography Principles: Advanced Techniques, Fundamentals, and Creative Vision
This article examines and discusses photography topics and their applications. To create beautiful and striking photos, a deeper and more comprehensive understanding of advanced photography is needed. The importance of lighting, including both natural and artificial lighting methods and their potential effects on mood, tone, and clarity, is covered in greater length in this article. Other significant technical ideas including symmetry and asymmetry, leading lines, figure and ground relationships, the Golden Ratio, and the Rule of Thirds will also be covered in this article.
This Story also Contains
- ADVANCED PHOTOGRAPHY PRINCIPLES
- Basics of Image Editing
- What is HDR Imaging?
Additionally covered are the fundamentals of image printing and editing, which will enable photographers to create more technically sound and visually appealing images.
ADVANCED PHOTOGRAPHY PRINCIPLES
Given below are the advanced photography principles that you should focus on:
Lighting Conditions
The quality and type of lighting used is essential for a visually more pleasing composition and effects in an image for photography. Artificial and natural light with their positioning with respect to the subject can impact clarity, tone, and emotion strongly. Photographers can control and play a subject more skillfully by paying attention to how light plays with its angles and shadows. Hard light draws attention to angles and textures, whereas soft light softens facial characteristics. And therefore with the correct knowledge and understanding, acquiring natural and artificial lighting documentation skills becomes important in generating amazing photographs.
Natural Light
"Natural Light" is defined as light that comes from the sun or any other natural source. Depending on the time of day, the weather, and the location, natural light has different strengths, colors, and directions.
Sunlight is the most common and powerful natural light source. At sunrise and sunset, when the light is high in the sky, it can cast clear shadows and produce vibrant colors that result in warm, fuzzy tones.
Artificial Light
Artificial lighting in photography refers to using artificial light sources, such as LED panels, lamps, and flash units, to illuminate subjects. It provides control and consistency, which are necessary to keep lights consistent. Photographers can create desired moods and atmospheres by adjusting colour temperature and intensity.

Artificial Lighting gives the control over photography conditions like :
Control and Consistency: Offers consistent lighting settings for product and studio photography.
Changeable Colour Temperature and Intensity: This feature enables the development of neutral, cool, or warm tones to improve the mood and ambience of an image.
Shadow management: modifies the depth or softerness of shadows; diffusion devices and softboxes are used to create visually appealing portraits.
Artistic Lighting Techniques: Offers eye-catching effects including high-key setups and backlighting to accentuate depth and intrigue.
Advanced Lighting Techniques
Backlighting: Backlighting places the light source directly behind the subject, forming either a dark silhouette or a glowing edge. This setup works wonders in portraits, nature shots, and photos of buildings because it makes hair, glass, and thin lines almost sparkle. If the light is soft-usually through mist, clouds, or a diffuser-the image can feel dreamy and otherworldly. To stop the front from going too dark, simply bounce a reflector back or slightly raise the exposure.
Side Lighting: Side lighting streams in from left or right, carving out texture with long, sweeping shadows. Its favorite haunts are portrait boxes, food spreads, and tabletop scenes, where gentle contrast reveals every crease and curve. By nudging the lamp closer or farther, photographers dial in how brash or subtle the shadow will be, letting them paint a deeper, three-dimensional look. The only rule is to keep the camera in line with the light so those angles stay sharp.
Diffused lighting: turns a hard bulb into soft, wrap-around illumination by passing it through fabrics, panels, or carved softboxes. With that cushion in place, portraits gain glamour, products keep their color, and close-ups lose mean, glaring hotspots. Because diffusion spreads the glow evenly, detail pops without once blowing out the highlights, giving the whole scene a calm, friendly look.
Principles of Photography (Technical)
Placing the visual components inside the frame deliberately is called composition in photography. These components are assembled in order to make a unified and powerful picture. Photographer needs to balance and arrange carefully every object in the scene to get the ideal shot. With good technical understanding of “Rules of Composition”, better visual aesthetics can be created.
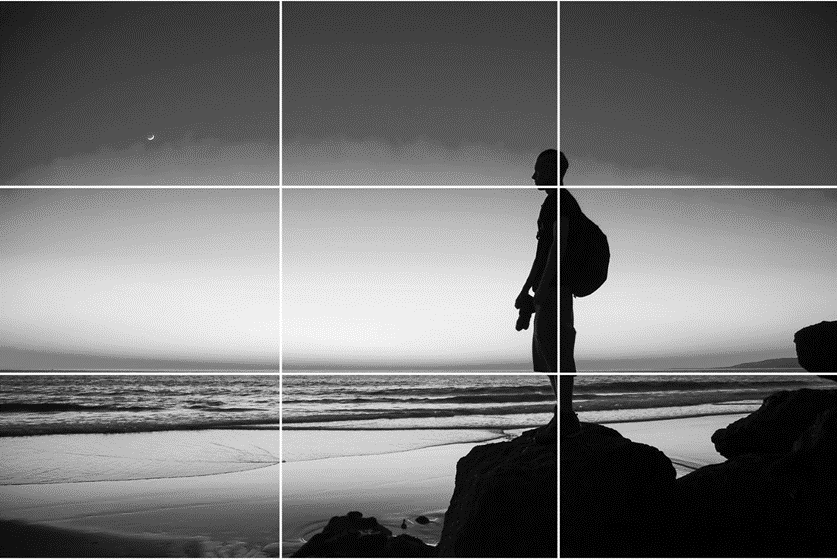
Rule of Thirds
Rule of thirds is a guideline for layout to create balanced and dynamic photographs. According to the Rule of thirds, any design composition or image can be broken into a grid of 3 X 3, that is 9 equal boxes we get by dividing rows and columns in equal dimensions over the composition.
Photographers needs to master composition for better and improved picture quality and to produce visually pleasing photographs.
The Golden Ratio
Golden ratio is a mathematical ratio which is around 1.618:1 and is frequently seen in nature and art. To create more balanced and organically beautiful photographs, photographers arrange the subject at points that coincide with this ratio. By achieving harmonious proportions with the help of Golden Ratio, more visually pleasing photographs can be produced.
The Calculated value of the Golden Ratio is 1.61803398875 (Phi)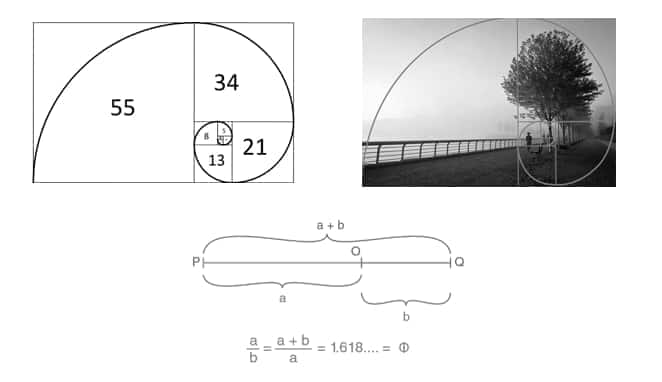
Leading Lines
In photography, design elements known as prominent lines are utilized more often to draw the gaze of the viewer to the primary topic. Roads, rivers, fences, and architectural elements are a few instances. Consider an image of a pathway winding through a forest, which naturally draws the viewer's attention to the path while simultaneously enhancing depth and focus. This technique is typically applied to enhance the narrative and visual flow of a shot.
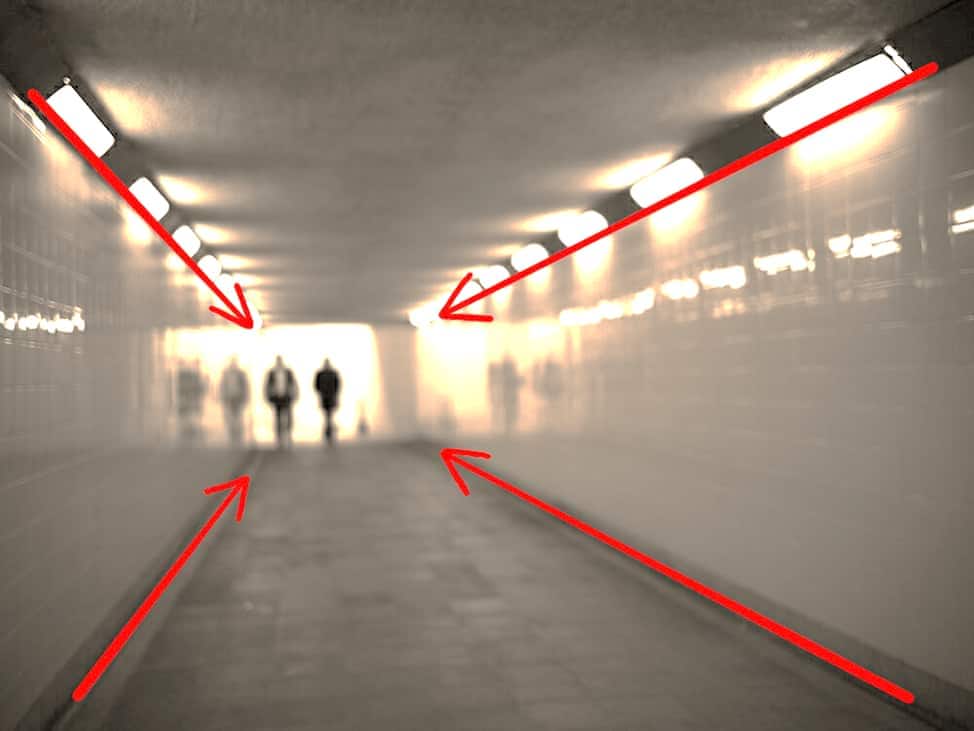
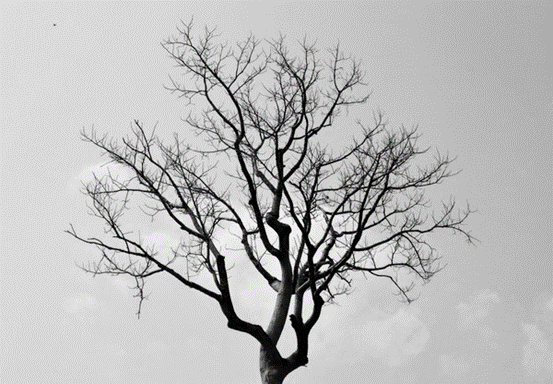
Figure and Ground :
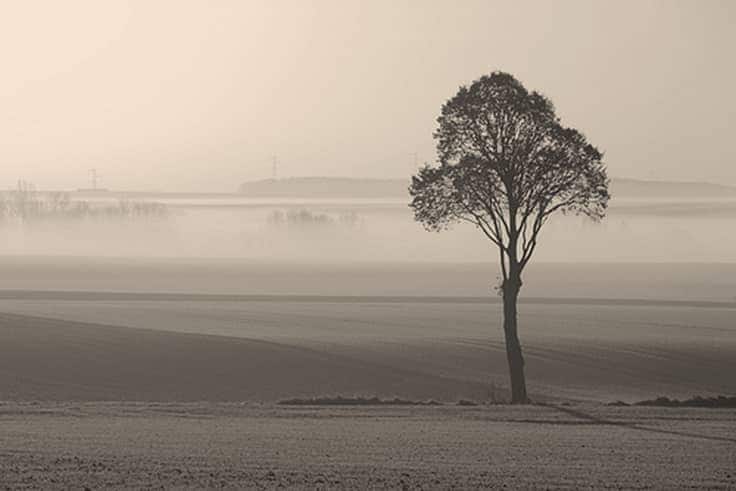
"Figure to Ground" is the principle in photography which showcases the relationship between the subject (figure) and background (ground).
For instance, it is easy to discern the tree (figure) from the sky (ground) when a dark silhouette of the tree is seen against a brilliantly light sunset sky. This method draws attention to the main subject and increases visual interest.
Symmetry & Asymmetry in Photography
In photography, symmetry and asymmetry are essential compositional elements. A building reflected in water exemplifies how symmetry creates balanced images with mirrored parts on either side, suggesting harmony and stability. Asymmetry adds vitality and visual appeal by contrasting and including off-centre features.
-Symmetry in Photography establishes a feeling of balance and order. For example, a striking composition can be achieved by placing the subject of a portrait on one side against a contrasting background.
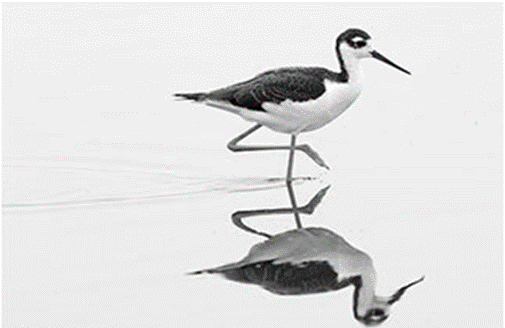
Symmetrical Reflection of Bird in Water
- Asymmetry in photography: Assembling elements off-centre to produce a dynamic and visually appealing composition is called asymmetry.
For Example, Imagine a picture of a growing Mushroom with off-centre. This image makes you tense and drawn to gaze about the frame. Asymmetry, unlike perfect symmetry, feels more organic and encourages people to linger over the image.
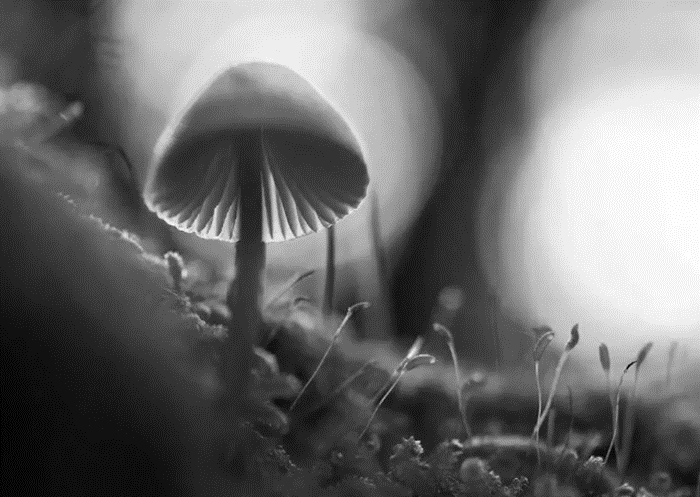
Image of a Mushroom, Asymmetrical Composition
Asymmetry adds movement and excitement, while symmetrical provides calm equilibrium. Both approaches are crucial for boosting photographic artistic expression and visual narrative.
-Radial Symmetry is the art of making a sense of symmetry using circular or radial patterns. A photograph with radial symmetry has a sense of harmony and order.
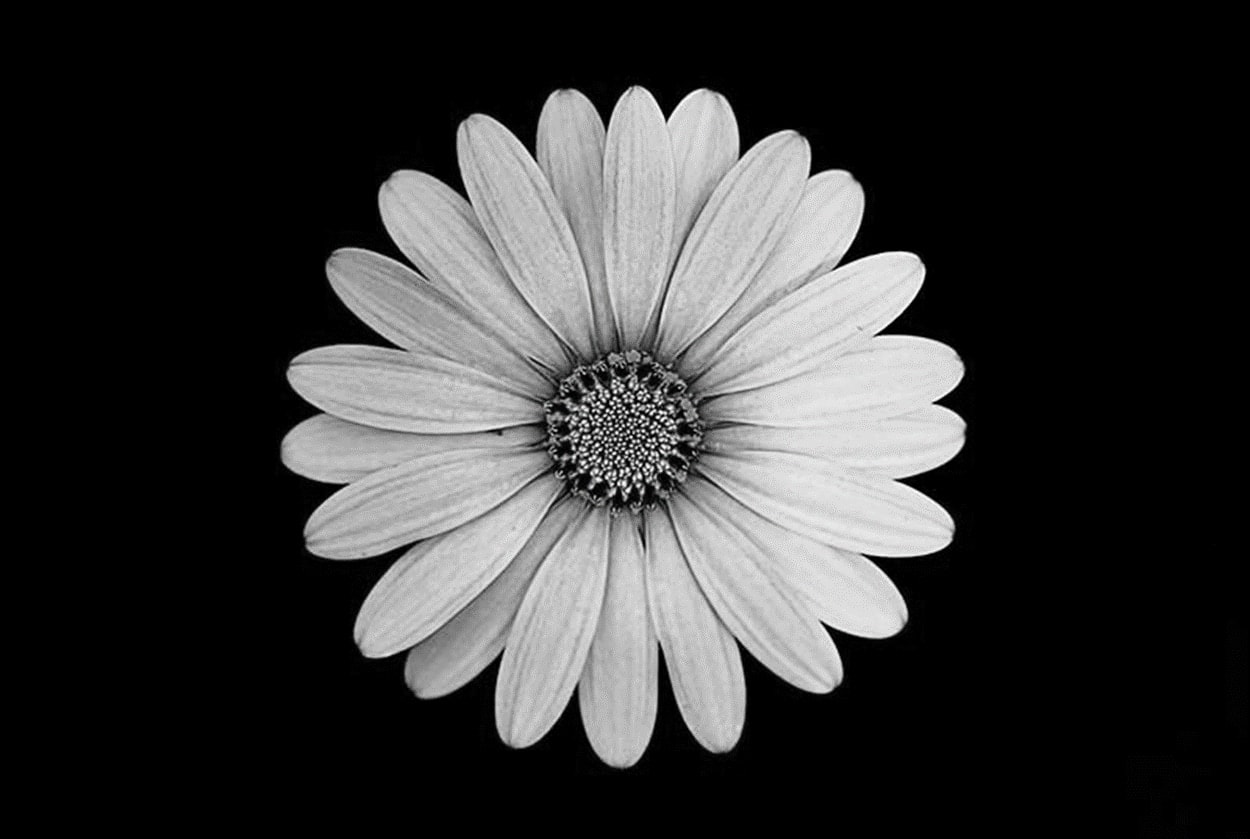
For Example: Picture a flower in full bloom, with petals equally dispersing from the centre. The central point draws Your eye inward, which becomes the focal point. This method is frequently employed in nature photography (spiral seashells, sunsets with star trails).
You can also refer to:
Basics of Image Editing
Given below are the basics of image editing everyone should know:
Overview
Photo editing is making changes to a photograph to enhance its appearance or produce a desired effect. It can include more intricate manipulations like compositing and retouching and more straightforward alterations like cropping and straightening etc.
Must Know Techniques and Tools for Editing
Cropping: Removing an image's undesired exterior regions to enhance focus, composition, or frame.
Straightening: Orienting the picture to make up for skewed or slanted components.
Exposure Adjustment: Adjusting the image's brightness to make sure it is neither overexposed (overexposed) nor too dark (underexposed) is known as exposure adjustment.
Contrast: To create depth and detail, increase the difference between the image's lightest and darkest areas.
White Balance is the process of adjusting the colours to compensate for the light source's colour temperature and make the image appear more natural.
Saturation and Vibrance : Increasing or decreasing the intensity of colours in an image is known as saturation and vibrancy.
Noise Reduction: Noise reduction lessens an image's graininess or speckles, frequently brought on by dim lighting.
Fundamentals of Image Printing
RGB Vs. CMYK Color Model:

RGB Model
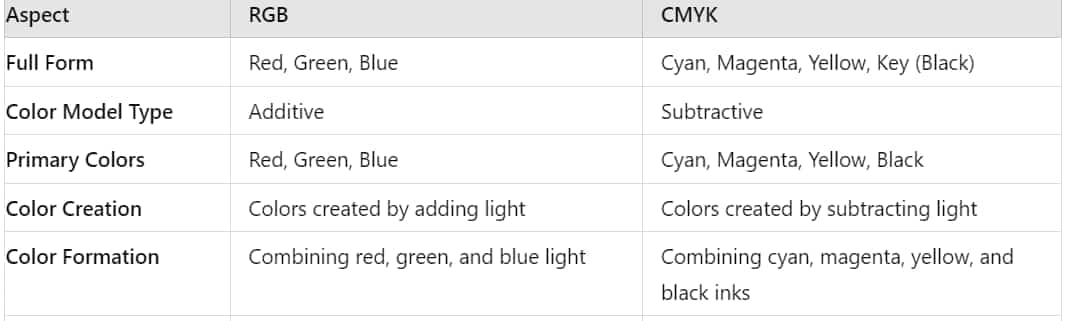
The RGB (Red, Green, Blue) colour model combines different intensities of these colour’s light to create colours and is used in electronic and digital displays. When the intensity of all three colours is maximised, white light is created. RGB is perfect for colourful digital images because of its wide colour spectrum. This model is frequently used in digital photography, web design, and other media that use light-based displays.
CMYK Model
CMYK (Cyan, Magenta, Yellow, Key/Black) is a subtractive colour model utilised in colour printing. It produces colours by removing light with cyan, magenta, yellow, and black inks. When mixed, these inks absorb light at different wavelengths to create a variety of hues, with black being made by all four. With a narrower colour spectrum than RGB, CMYK is better suited for printing on tangible materials like paper. Producing printed items like brochures, posters, and packaging uses the CMYK model for optimised results.
Below is a table that compares the RGB vs CMYK Printing Theory.
What is HDR Imaging?
HDR imaging mixes several photos taken at different brightness levels to show more light and shadow detail than a single shot can. By blending these exposures, the final picture looks closer to how our eyes see bright skies and dark ground at the same time.
How HDR Works?
Multiple Exposures, a camera takes three or more photos; one dark, one normal, and one bright, so every part of the scene gets recorded.
Image Merging, programs like Photoshop or Lightroom stack the shots and keep the best parts, saving detail in both glare and deep shadow.
Tone Mapping, the merged file gets a final adjustment that fits computer screens or prints, either preserving realism or adding a special feel.
Benefits of HDR Imaging
Enhanced Details, because it blends different stops of light, HDR shows textures in bright clouds and dark tree trunks that a plain photo might lose.
Richer Colors, the wider light data lets the camera record subtler reds, greens, and blues, making sunset skies and forest scenes pop without looking fake.
Realistic Lighting, by copying how our own eyes adjust to glare and gloom, HDR images feel more like a memory than a flat snapshot on the wall.
BRAIN TWISTER EXERCISE
Question: Using the last three photos in your phone, create a composite image conveying a story. Explain your creative approach, the story you want to tell, how you selected the photos and the methods you used to make them mix smoothly.
Frequently Asked Questions (FAQs)
The Rule of Thirds is a composition technique where the image is divided into nine equal parts using two horizontal and two vertical lines. Placing key elements along these lines or at their intersections creates a more balanced and engaging composition.
In order to capture a greater range of light and detail and produce an image with more balanced highlights and shadows, HDR (High Dynamic Range) entails taking numerous exposures of the same scene and combining them.
The three most important principles of photography are composition, light and subject.
The principles of photography are balance, contrast, emphasis, movement, pattern, rhythm, and unity or variety.
