

Basics of Photography: History, Concepts & Fundamentals
Photography is a powerful tool that plays a significant role in diverse design domains like Visual Storytelling, supporting the validation of the points, enhancing presentations, capturing moments, etc. Such questions help in design exams like NID (National Institute of Design) and UCEED (Undergraduate Common Entrance Examination for Design). The knowledge of basics of photography and understanding of techniques is not only practical from a theoretical point but also developing the concept for practical application. Read the article to learn basics of photography.
This Story also Contains
- History of Photography
- What are the Different Types of Cameras?
- Fundamentals of Photography
- Camera Accessories

History of Photography
The journey of photography started with the capture of light! Scientists have long known that a camera obscura may project images, acting as an organic projector. Then, in 1826, a pewter plate was used to take the first-ever permanent photo for a long exposure time of more than 08 hours. Later, the daguerreotype camera came along and cut the exposure period down to minutes. This breakthrough made it possible to record historical events and even portraits as we use today. Now, we can capture fleeting moments and share them with the world thanks to the instantaneous and accessible nature of modern photography.

How a human vision perceives the landscape
What are the Different Types of Cameras?
Given below are different types of cameras:
1. DSLR Cameras: The full form for DSLR is Digital Single-Lens Reflex. DSLRs are great cameras where clear pictures are needed to be taken and they also have removable lenses which let you frame by looking through the lens. These have a mirror and prism inside which helps with the frame. DSLR are the most preferred by photographers for their manual controls, different lenses, & amazing image quality.
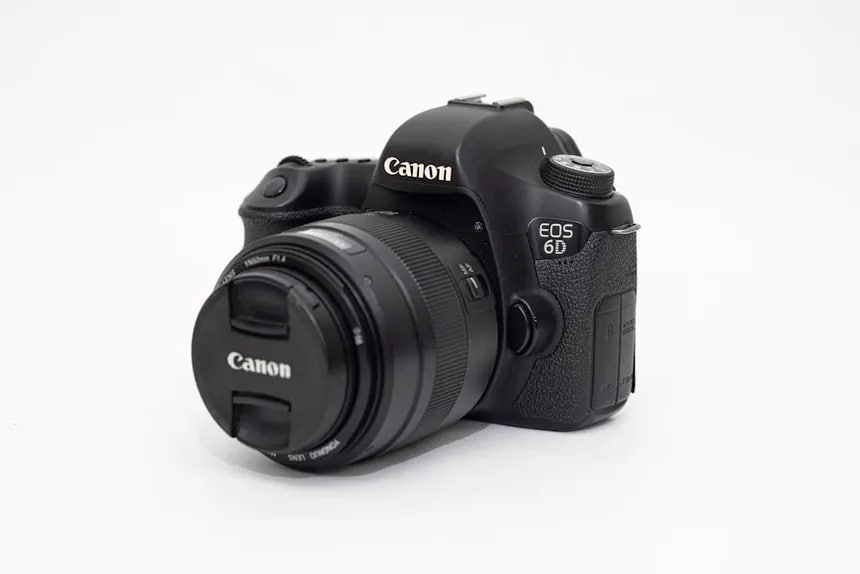
DSLR (Digital Single-Lens Reflex) Camera
2. Mirrorless Cameras: These cameras are lighter & more stylish! They skip the big reflex mirror you see in DSLRs. With fancy interchangeable lenses and an electronic viewfinder, they show you what the camera will take before you snap the pic. This gives you a lot of creative options. You can use features like focus peaking or real-time effects—perfect for both beginners & pros!
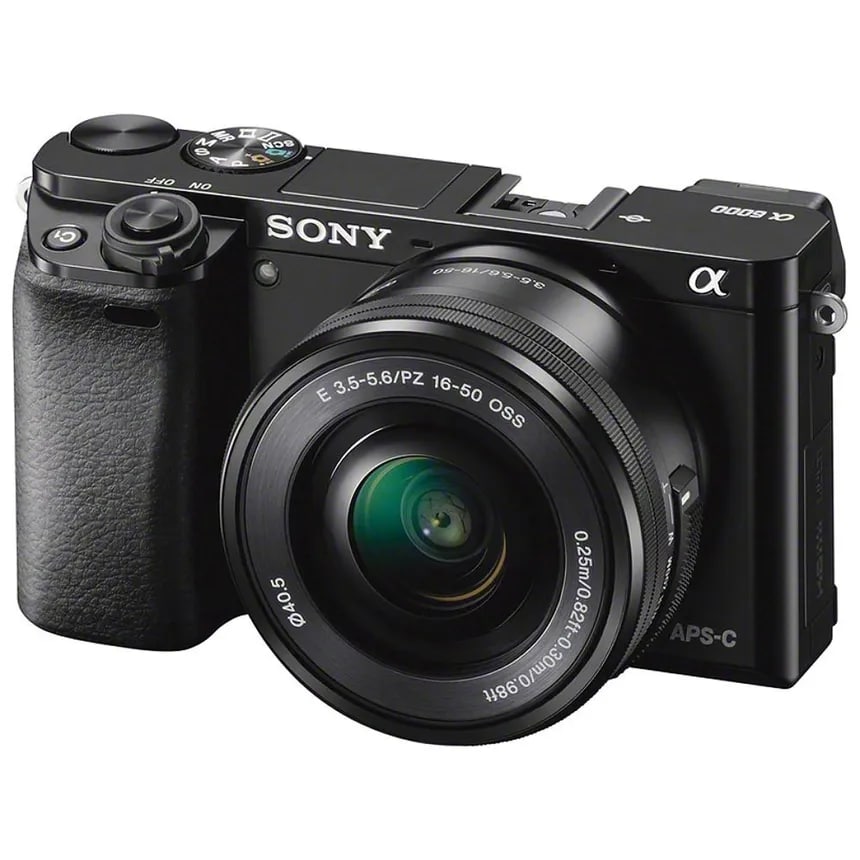
Sony Mirrorless Camera
3. Point-and-shoot cameras: These cameras are small machines which makes them portable and easy to use. They have built-in flash and autofocus, so they take excellent photos quickly. These are easier to use as it provides users with high-quality images without fussing too much with the settings. They also have a simple automatic mode and a fixed lens.
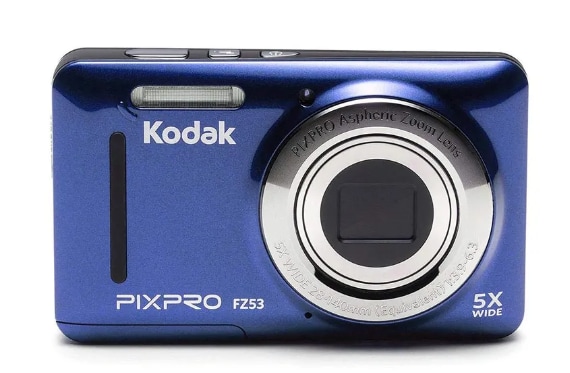
Kodak Pixpro Point and Shoot Camera
4. Smartphone Cameras: Phones today have some cool camera perks! They're super portable, thanks to their tiny size. Plus, computational photography helps fix low-light scenes and zoom issues. You can quickly share your photos too! Even though they don't have big sensors, they're perfect for snapping pictures on the go while getting excellent image quality.
Google Pixel 2
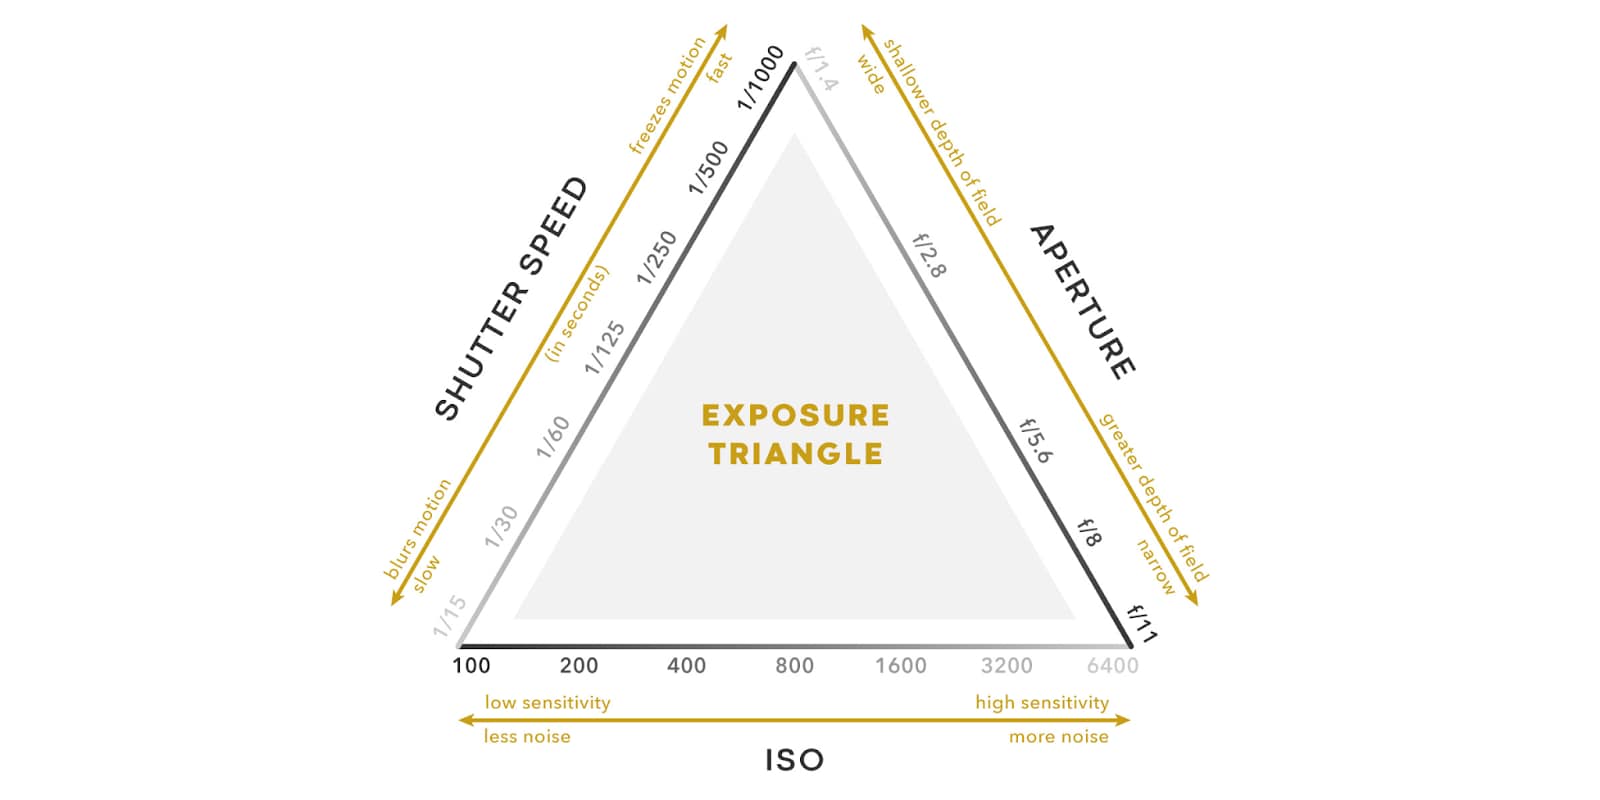
Fundamentals of Photography
For Photography, we need to understand the exposure (Controlling the light duration and intensity). It controls the perceived lightness or darkness of a picture as your camera photographs it.
The 3 basics of photography that affect exposure are as follows, combined and also known as the “Exposure triangle." Mastering these components will enable you to manipulate your camera and provide the desired effect in your shots.
Aperture
Shutter speed and
ISO
You can refer to the below articles:
- Fundamental Geometry Concepts for 2D Shapes
- Applications of Photography - Advance Photography Techniques
- Projection and Views
- 12 Principles of Animation
Aperture (F-Stop)
The small opening from where light enters the camera is called the aperture. It is measured in f-stops, such as f/2.8, f/4, f/8, or f/16 etc.
Wide Aperture (Small f-number, such as f/2.8): Provides a shallow depth of field by letting in more light. This is great for portraiture since it makes the subject stand out against a blurry background.
Narrow Aperture (High f-number, such as f/16): Increases depth of field by letting in less light. This makes the scene more sharply focused, making it ideal for landscape photography.
For instance, Let us understand the basics of Aperture from the image below.
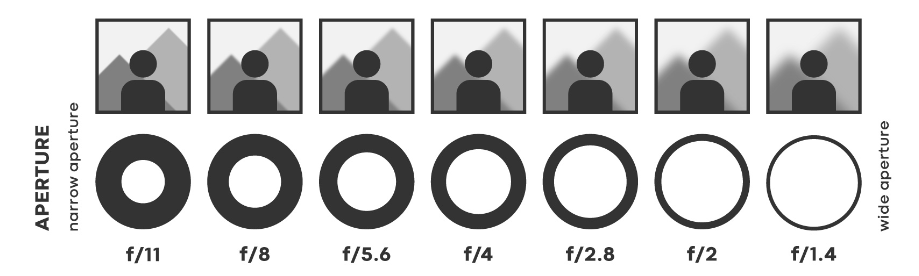
f/2.8 (Wide Aperture)
Take note of how the blurry background isolates the subject.
f/16 ( Narrow Aperture)
Observe how the background and foreground are both sharply focused.
Shutter Speed
The duration of time for which the camera's sensor is exposed to light is called shutter speed.
It is measured in Seconds or fractions of a second (such as 1/1000, 1/250, or 1/30).
Fast shutter speed (e.g., 1/1000): This stops motion and helps take pictures of subjects moving quickly, such as animals or sports.
Slow Shutter Speed (1/30, for example): Blurs motion, making it perfect for adding movement to pictures like light trails or waterfalls.
Let us understand through visual examples.

Fast Shutter (1/1000) captures and stops the motion of fast-moving objects/animals like birds in flight. Meanwhile, 1/30 is the slow shutter speed, which is useful in light arts that need to capture light for a longer duration.
ISO
ISO is referred to as the camera’s sensitivity to light. A greater value of the ISO is required to capture the images at night or in low light, whereas a lower value between 100-400 is used to photograph in proper lighting conditions. The challenge is that the higher the value of the ISO, the more grainy and distorted the image becomes. In the auto mode, the camera adjusts the ISO automatically; however, in the manual mode, this needs to be optimised for perfect photographs.
Low ISO (100):
Clean image with minimal noise, taken in bright daylight.
High ISO (6400):
Noticeable noise in the image, taken in low-light conditions.

Camera Dial Symbols/Modes and Settings
A regular DSLR camera has many symbols imprinted over the dial, each with a specific purpose, as shown below. In previous NID and other design examinations, the meaning of some symbols(as depicted below) and their use have been asked directly.
For Example, What does Symbol-A mean when the auto is already given on the dial?
Here, A means Aperture Priority mode(A).
When using the Aperture Priority mode, you can regulate the depth of focus in instances when you want to: You set the aperture (f-stop) value, and the camera changes the shutter speed correspondingly to obtain the correct exposure.
AUTO Mode: Most of the new users utilise the auto mode of the camera to begin with the initial handling of the camera for enhancing the photography. The technique behind this is the light-metre reading, which works in milliseconds before the photograph is clicked and is so quick that the user may not even notice. This is how the camera selects the auto mode setting. A blinking green rectangle in some cameras is present in some machines to represent it through the viewfinder.
Macro Mode: This icon represents your macro capability, which you may use to extend the focus range of your camera and get up close and personal to catch minute details. It's perfect for photographing flowers, insects, and abstract subjects. However, after using your macro mode, don't forget to return to a different option to avoid delaying your concentration.
![1728038060613]()
Landscape Mode: Most cameras include a unique setting for capturing the most significant aspects of a subject, which is ideal for landscape enthusiasts. With a wide depth of field, this option will automatically focus the camera on most of the scene.
![1728038060752]()
Night and Party Mode: Both refer to the same feature: they are appropriate for use in low-light conditions. The camera must utilise slower shutter speeds in night mode since it knows there isn't much ambient (natural) light. To aid with exposure, it may trigger your flash automatically. As a result, you may get unexpected light trails and freeze-framed motion.
![1728038060811]()


Program Mode: Although aperture and shutter speed are crucial for taking pictures, there are other settings on your camera that you should know about as well, and program mode will help you do so. You may adjust the ISO, exposure metering, and white balance while shooting by going into the program. Perfect for individuals who prefer to refine their work in the field and are a little bit more experienced.

Manual Mode: With manual mode, you hold the power. Regarding ISO, shutter speed, and aperture, the camera will step back and let you make all the selections. If you make a mistake in your settings, it won't assist you in balancing the exposure, but once you understand this feature, unique creative possibilities arise.
Aperture Priority: With aperture priority, you can select the aperture size while the ISO and shutter speed are automatically adjusted to get the best exposure. You can use it to learn about aperture without worrying about other settings, making it a great tool.
![1728038061550]()


Camera Accessories
Given below are camera accessories that are essential in the photography kit.
1. Tripod:
A tripod is a three-legged stand that stabilizes the camera, providing the necessary support for clear, sharp images. It is especially important when shooting with slow shutter speeds or in low-light conditions, where even small camera movements can cause blur.
When to Use:
Landscape Photography: Long exposure shots often require the camera to be completely still, especially when capturing low light or night scenes.
Long-Exposure Photography: The tripod ensures that the camera stays steady for extended periods, allowing you to capture smooth water, light trails, or the movement of stars.
Portraiture: It helps when you need a consistent and steady framing, especially in studio settings where precise compositions are needed.
Time-Lapse Photography: A tripod provides a stable platform for capturing a series of images over time, crucial for smooth transitions in time-lapse videos.
Types of Tripods:
Compact Tripods: Lightweight and easy to carry, perfect for travel photography or street photography.
Heavy-duty Tripods: Used in professional setups or for large cameras and lenses, providing maximum stability.
Flexible Tripods: These can be bent and shaped to support the camera in unique or tight spaces.
2. Lens Filters:
Filters are a valuable tool in a photographer’s kit as they help modify how light interacts with the lens, adding creative effects, or improving image quality. Some filters are made for specific situations, while others serve more general purposes.
UV Filters:
Purpose: Initially used to block UV light, these filters are now primarily used to protect the lens from scratches, dust, and other elements. They are clear and do not affect the exposure or color of the photo.
Use Case: Essential for outdoor photographers to prevent damage to the lens.
Polarizing Filters:
Purpose: Polarizers reduce reflections from non-metallic surfaces like water, glass, or wet pavement, allowing you to capture more detail in reflective surfaces. They also enhance the contrast in blue skies, making clouds appear more defined.
Use Case: Ideal for landscape photography to deepen the colors of the sky and reduce glare from surfaces like water or leaves.
ND (Neutral Density) Filters:
Purpose: ND filters reduce the amount of light entering the camera lens, allowing you to use slower shutter speeds even in bright conditions. This is crucial for techniques like long exposure in daylight, such as capturing the smooth movement of water.
Use Case: Commonly used for creating blurred motion in bright environments or for controlling depth of field in very bright lighting conditions.
Graduated ND Filters:
Purpose: These filters have a gradient, where one part of the filter is darker than the other. This helps balance the exposure between the bright sky and darker ground in landscape photography.
Use Case: Useful for situations where the sky is much brighter than the foreground, such as in sunset or sunrise photography.
3. External Flash:
An external flash provides more control over lighting compared to the built-in camera flash. It can be adjusted in terms of intensity, angle, and direction, giving you better control over the lighting conditions in your shots.
Benefits:
Reduces Harsh Shadows: Built-in camera flashes often create harsh shadows on the subject’s face, making the lighting look unnatural. An external flash allows you to bounce the light off a wall or ceiling to diffuse it, creating softer and more flattering light.
More Power and Range: External flashes typically offer more power than built-in ones, allowing you to shoot subjects at a greater distance or in larger spaces without compromising the quality of the image.
Flexibility: You can tilt, swivel, and rotate external flashes to change the direction of the light, which helps in achieving different lighting effects like Rembrandt lighting or butterfly lighting in portrait photography.
Types of Flash:
Speedlights: These are small, portable flashes that can be attached directly to the camera’s hot shoe or used off-camera with a wireless trigger. They are great for both indoor and outdoor photography.
Studio Strobes: Larger and more powerful, these are used for studio photography. They offer more customization in terms of light modifiers like softboxes and umbrellas.
Ring Flashes: Mounted around the lens, ring flashes provide even lighting around the subject, which is especially useful for macro and portrait photography.
Modifiers:
Softboxes: Attachments to flashes that diffuse light for a softer, more flattering effect. Ideal for portrait or product photography.
Umbrellas: These are used to soften and diffuse the flash by reflecting the light back onto the subject, creating a softer, more even light.
Frequently Asked Questions (FAQs)
The 3 basics of photography that affect exposure are as follows, combined and also known as the “Exposure triangle."
Aperture
Shutter speed and
ISO
Photography is a powerful tool that plays a significant role in diverse design domains like Visual Storytelling, supporting the validation of the points, enhancing presentations, capturing moments, etc.
For Photography, we need to understand the exposure (Controlling the light duration and intensity).
